Getting Started on KDP
January 15, 2019
Getting started on Kindle Direct Publishing (KDP) is easier than you might think. This post will walk you through the steps to get your first book published.
The first thing you will need to do is head over to KDP and sign in. If you currently have an Amazon account, you can use the same username and password for KDP. You can use the same account you use to buy stuff on Amazon or the one you have for your Merch account. If you want to set up a separate account just for KDP you can do that too. Just be warned – each person can only have one KDP account. Per Amazon’s terms of service, having multiple KDP accounts is cause for immediate and permanent expulsion. Even though each person can have only one account, you can have multiple pen names within that account.
If you are using an amazon account you already have, click on the “Sign in” button. If you are creating a new account, click on “Sign up”. After signing in or creating your new account, you will be asked to agree to the KDP Terms and Conditions. After you click on agree, you will be taken to your Bookshelf page. Your Bookshelf page will show the books you have upload and let you manage them. It is also where you go to create new books.
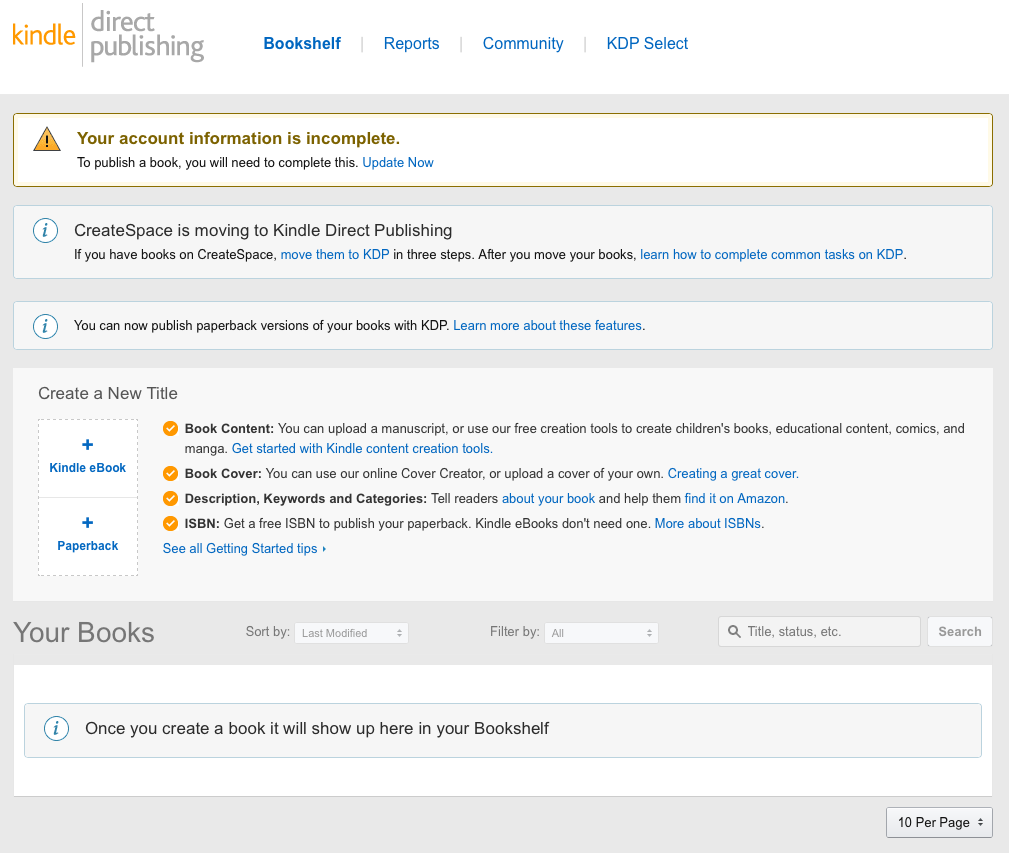
Before you get busy uploading books, you will want to get your bank account and tax information set up so you can get paid. To get this set up, you need to click on the “Update Now” link at the top of your Bookshelf page under “Your account information is incomplete.” You will need to enter your name, address, and banking info. Save that data, then complete the Tax Information.
Note the message that says “CreateSpace is moving to Kindle Direct Publishing”. You may have heard about publishing no content and low content books on CreateSpace. Many people have been very successful with those types of books on CreateSpace. However, CreateSpace is going away. If you have books on CreateSpace you need to move them to KDP. If you are just getting started with self-published books, you will want to stick with KDP.
Now that you have taken care of setting up your financial info, you are ready to publish your first book. For low and no content type books, you click on the “+ Paperback” box under “Create a New Title”.
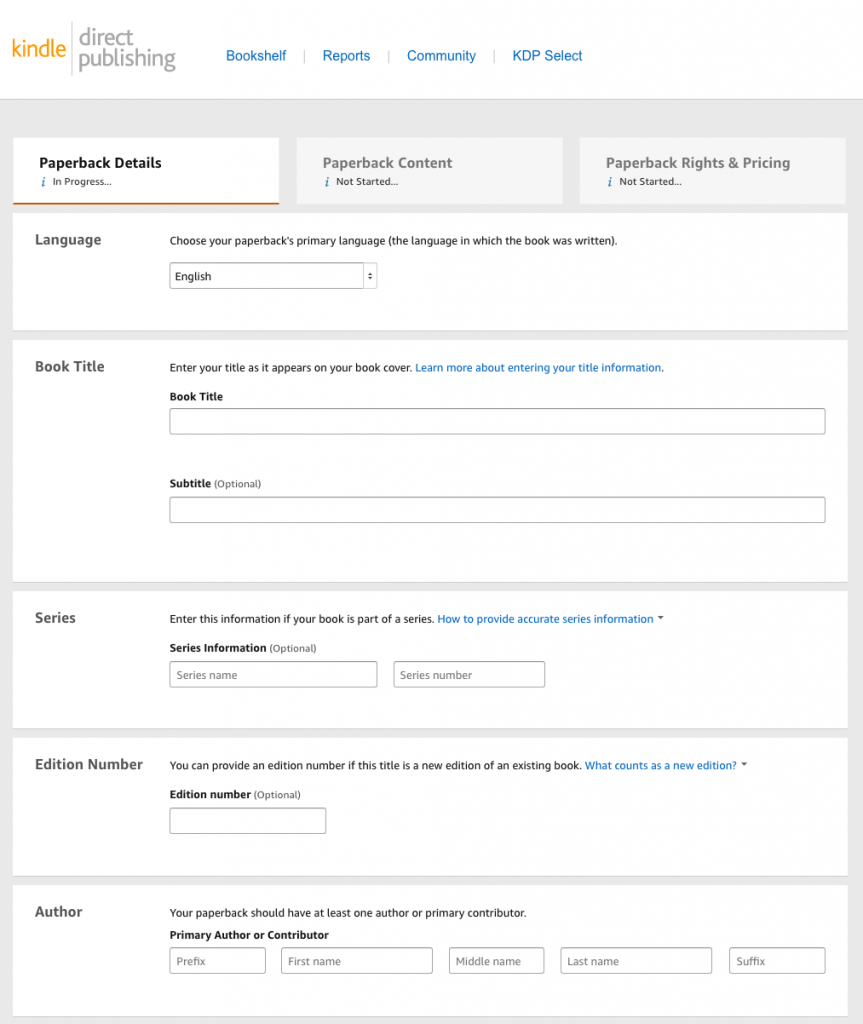
The first page you have to fill out for your book contains the paperback details. The information you put on this page will help buyers find your book. Don’t keyword stuff you title/subtitle, as that will get your book rejected. Instead, take full advantage of the 7 keyword slots.
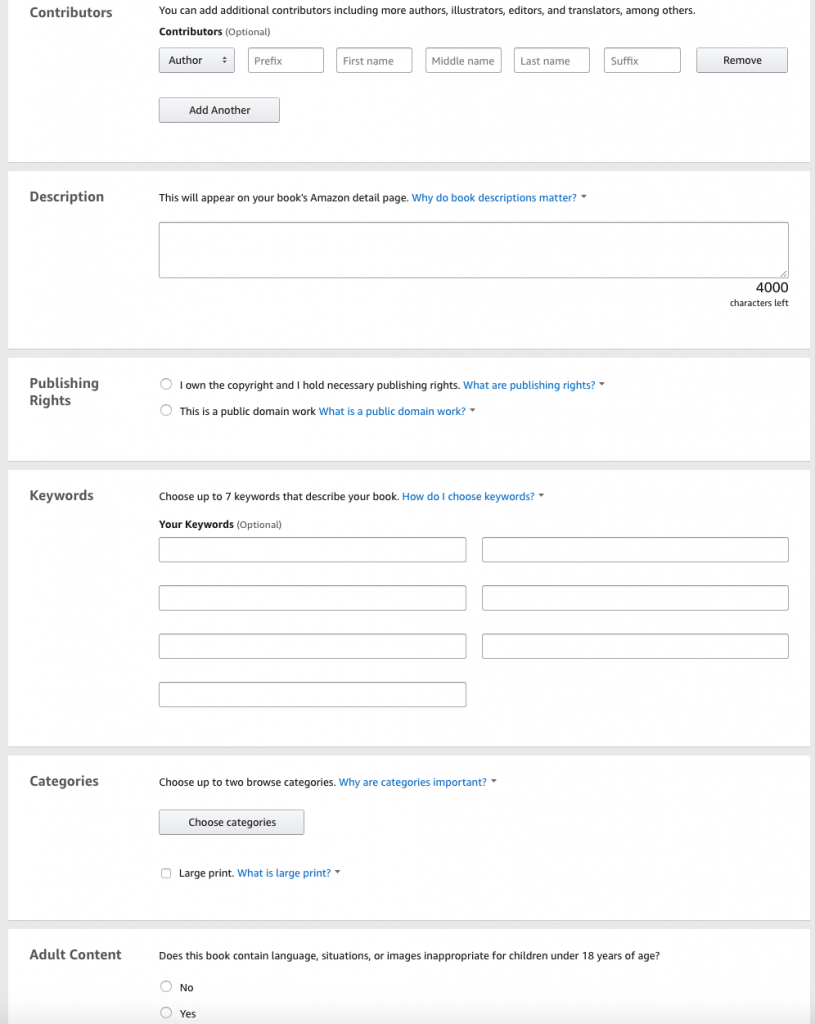
You will want to have a detailed description that tells everyone why your book is so great and why they need to buy it. You can also include html in your description to make your listing really stand out from the crowd. Check out this page to see which html tags are allowed in your book description. When you finish entering all the details for your book, click on “Save and Continue” to get to the Paperback Content page.
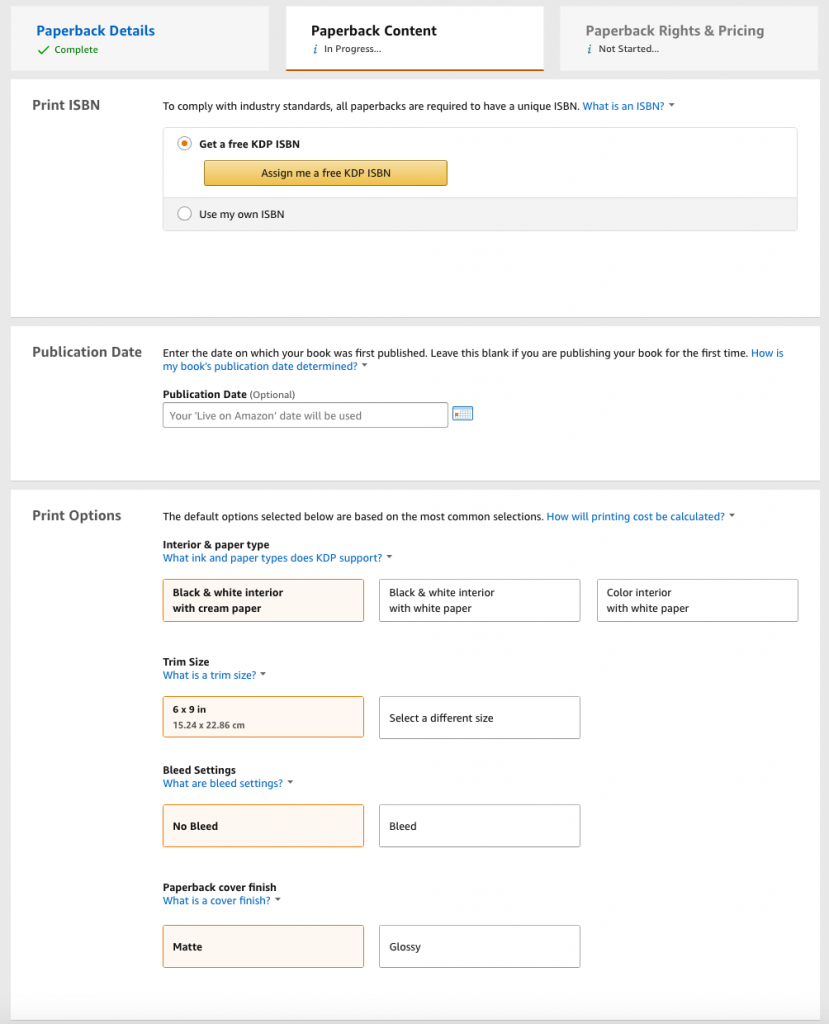
One of the great things about KDP is the free ISBNs. You are required to have an ISBN to publish your book and KDP will assign one to you for free. Note that you can only use the ISBN for publishing the book on KDP. You are not allowed to use the ISBN to publish the book with any other publisher. Click on the “Assign me a free KDP ISBN” to get your ISBN for this book.
Leave the Publication Date blank. It will get set to the date the book goes live on Amazon. Next, you will have to set the Print Options. KDP offers three different paper types: B&W interior on cream paper, B&W interior on white paper, and color interior on white paper. (The interior of your book are the pages inside the cover.) The printing cost of your book will be determined by the length of your book and the type of ink (B&W or color). Most low content book creators choose to have their interiors printed in B&W due to the increased cost of printing the interiors in color. For more information on the printing costs for your books, see this page.
After selecting your paper type, you will need to select the trim size for your book. (Trim size is the physical dimensions of your printed book.) You can see the list of trim sizes offered by KDP here. aududu book creator supports the creation of books for all of the trim sizes offered by KDP.
Next is the bleed settings. Setting your interior to “bleed” allows printing at or off the edge of a page. aududu book creator tools support the creation of interiors with or without bleed. Selecting bleed changes the size of the interior file expected by KDP. Our tools will automatically adjust the file size to match your bleed selections. Just be careful to select the correct bleed settings before you upload your interior file.
The last print option you need to specify is the cover finish. You can select either Matte or Glossy. This setting is a matter of personal preference. You can experiment with it and see which sells bests for your niches.
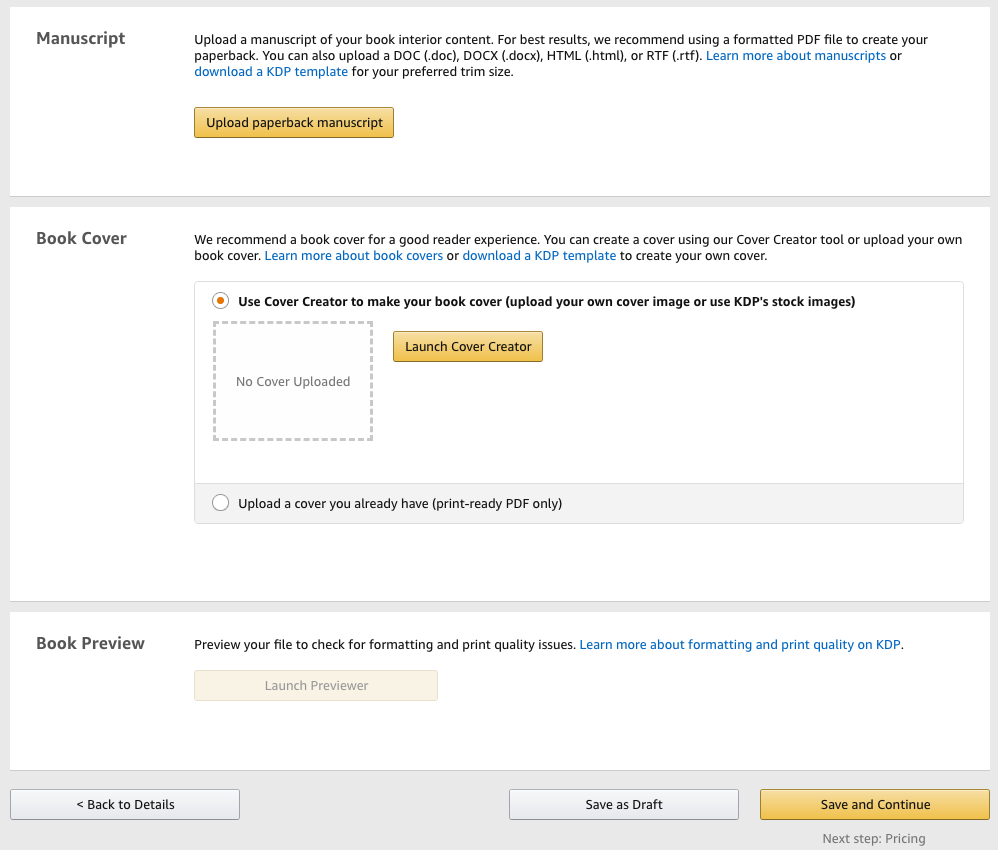
Now you are ready to upload the contents of your book. Click on “Upload paperback manuscript” to upload the interior of your book. Need an interior? You can create dot grid paper or lined paper using our tools. You can even take a customized page you created and turn it into a PDF with however many pages you need using our upload image tool.
After you upload your interior, you need to upload your book cover. You can create a cover using our create cover tool. This tool allows you to upload an image for the front and back covers. It will even resize and center the file(s) you upload to match the trim size you selected. You can specify text for the title that will be placed on the spine and pick the color for the text and the color for the background of your cover too.
Lastly, you will need to launch the previewer to proof your book. The previewer can sometimes take a very long time to load. If you give it time between uploading your interior and cover and launching the previewer, it will often launch right away. If there are any errors with your files, it will show up under Quality Check. Check over your pages and then click “Approve” when you have verified they look the way they should. Then click “Save and Continue” to get to the Paperback Rights & Pricing page.
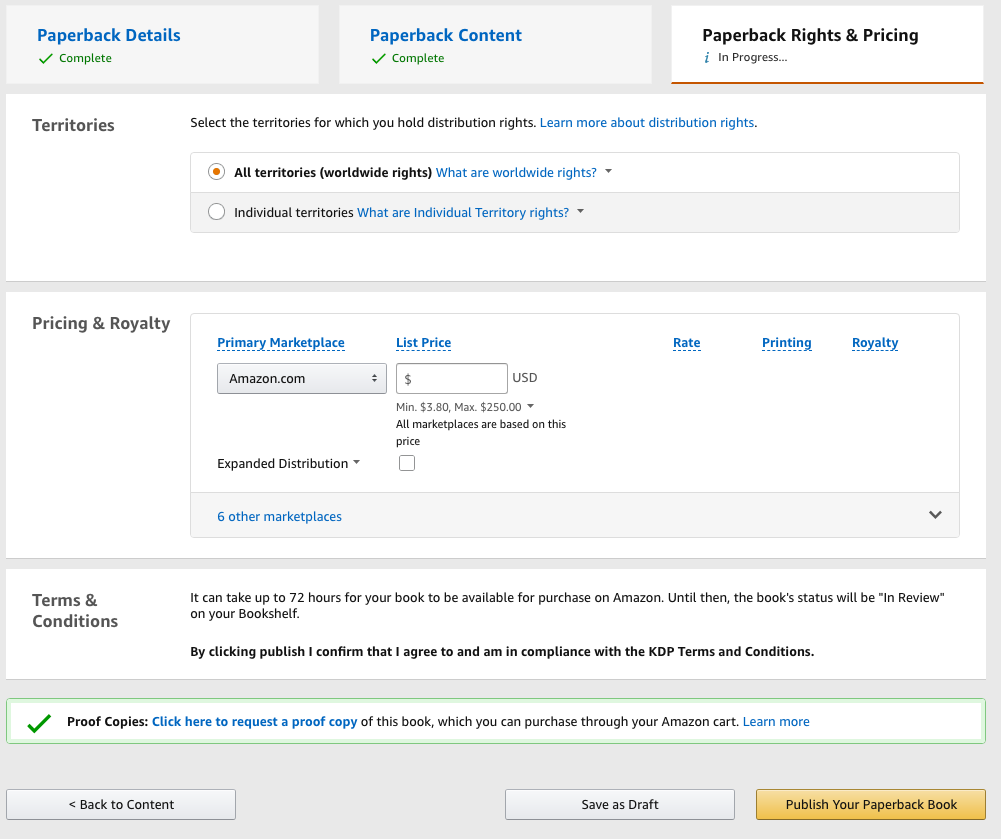
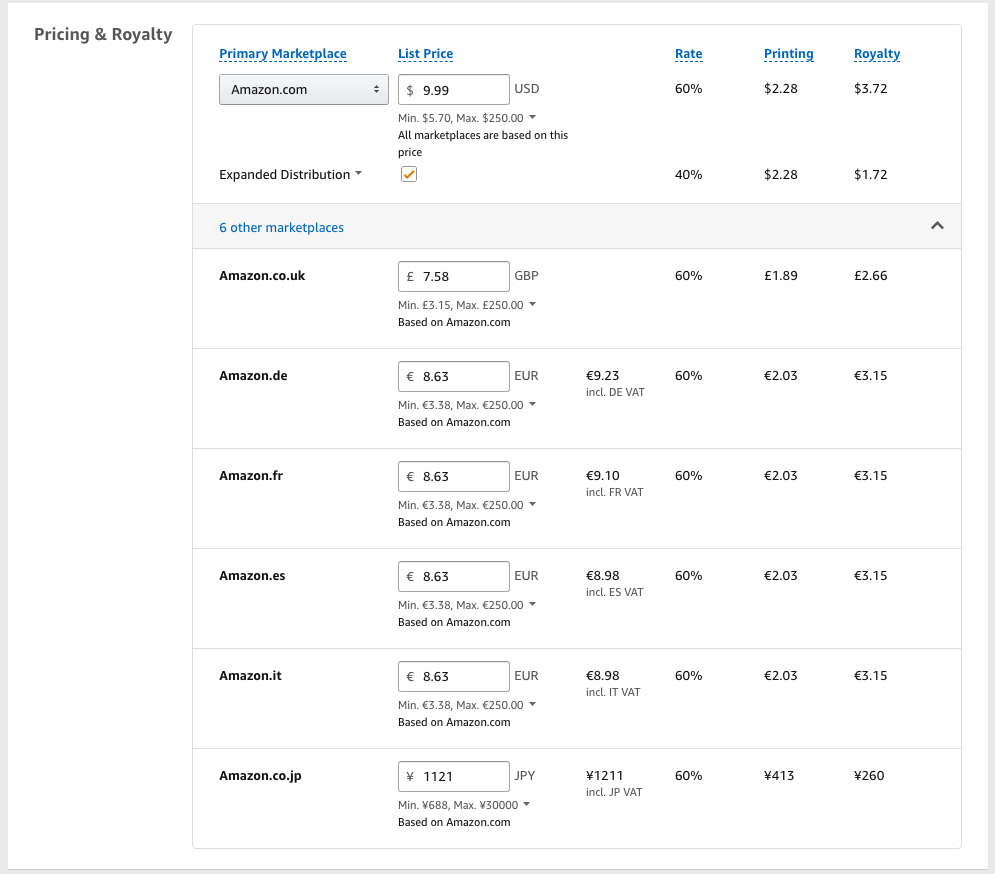
You can pick which territories you hold distribution rights. For low content books that you have never been published anywhere else before, you most likely have worldwide rights. You can read more about paperback distribution rights here. Next, you set the price for your book.